Wednesday, December 21, 2011
Xpresso.
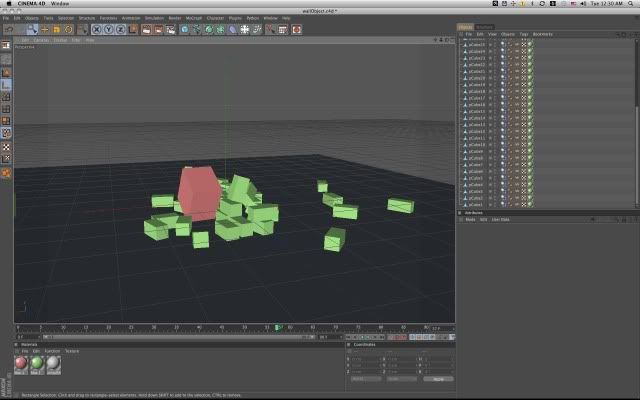
Lately I've been messing around with a lot of Xpresso in Cinema 4D. I got into a little project after awhile to challenge myself to learn more & different ways to use Xpresso in a "rigging" sense.
I'm sure everyone using a three-D program dreams of building a whole city from scratch (Well Nick Campbell & Chris Schmidt made that pretty easy to achieve). So I thought I'd try to full-fill that little dream a little bit with a tool that would help me do it faster with controls that easily manipulate the scale of the model with changing attributes pretty quickly. & most importantly make it run smoothly with tons & tons of buildings populating the scene.
The modeling itself isn't too complex but I wanted to concentrate more functionality then looks. Besides I wanted to more of a "toon" look for it.
Pretty much I've just a levels control to change the height, as well as depth & length. Pretty standard to making different shape & sized buildings. Then went on to having a control for windows & roofs. Building definitely always don't have the same windows & roofs so I made five variations that weren't too thought out but did the job. I can always swamp them out later. The fun thing about the windows & roofs is they generate accordingly with the height, length, & width of the building. That was a fun one setting up in Xpresso. I went on with a couple more details & then onto color schemes for the building & windows, cause you know, not all building are the same color. Pretty much there are five slots of colors to choose from & the slots of colors can be changed to different color as desired.
The last thing I added was the "Optimize" button. Naturally the poly count would get a bit high when making a block of buildings all looking different so I decided when you're done making the building you'd be able to swap it out with a "stand-in" that used less polys but the cool thing about it is that when you render it will maintain the original look of the building you picked. Your view-port is running fast & your render is looking good.
I plan to add some more to the rigg that will make it much better but thought for now I thought I'd share it. It was quite a fun challenge I must say.
Saturday, November 19, 2011
Vectorizing
So a while back I posted up a couple of sketches I've done & the decided to go ahead & vectorize them. Usually you would hear people do this all in Illustrator, but being more of an After Effects person, so I went ahead & did it in that program instead. It was definitely fun giving the sketch a crisp edges & some simple color.
Some different variation of the piece.
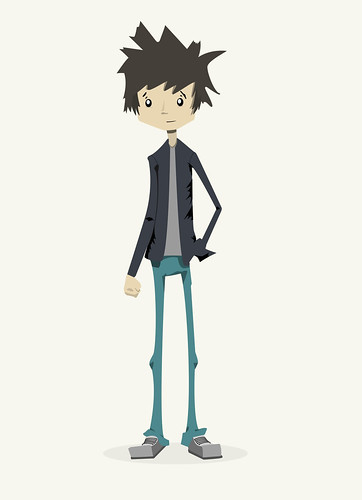
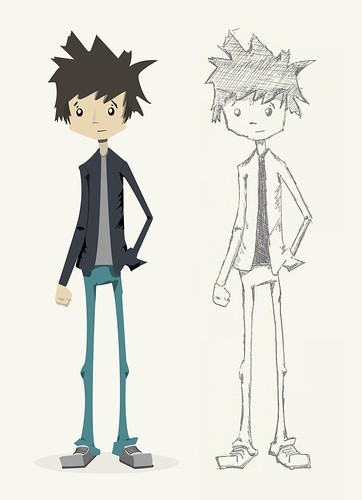
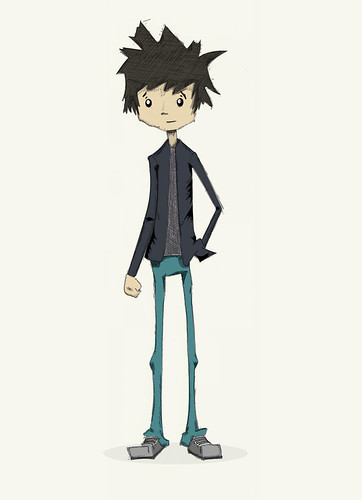
Some different variation of the piece.
Monday, November 7, 2011
New Glass
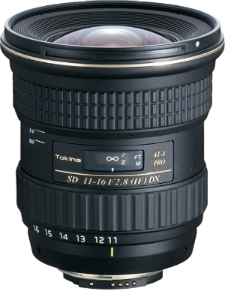
So lately I've been investing some money on some new glass. First lens I purchased was Canon's 50 mm 1.8, the lens that every photographer should have in there bag. The second was the Tokina 11-16mm 2.8, a wider choice of lens. I picked up the 11-16mm for shooting a lot of my BMX filming purposes. The first night I had the lens I shot a short edit of my friend riding at our local skate park. The lens did prove itself useful with the last shot I got of my friend. When I was shooting the clip I knew I wanted to keep the shot rather close to my friend & when I started shooting I didn't have a problem keeping him from being cut out of the frame.

Saturday, October 15, 2011
Reel '11.5
I finally got around to editing a new reel. I wasn't too sure with the song, I do like it myself but I do fear that some people may think the song is a bit obnoxious. After awhile not being able to decide if I wanted this to be my most up to date edited real, I just thought to hell with it, I'll post it up & that would be that. Well anyways, enjoy!
Wednesday, October 12, 2011
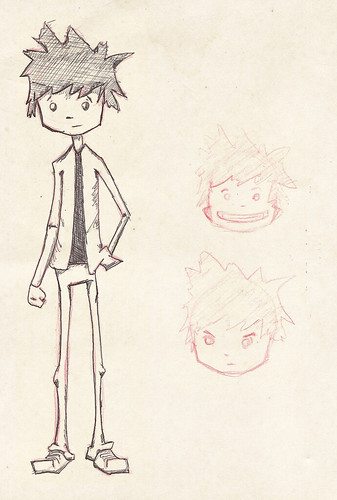
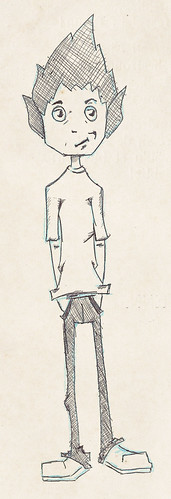
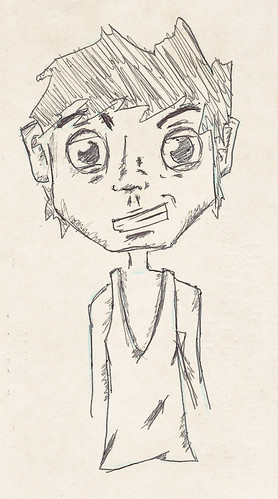
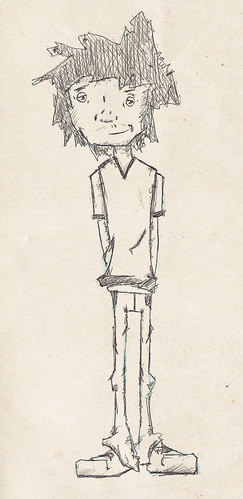
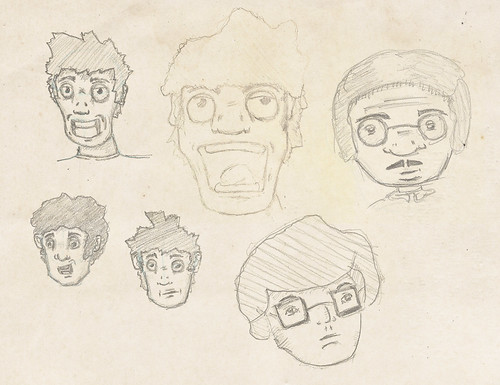
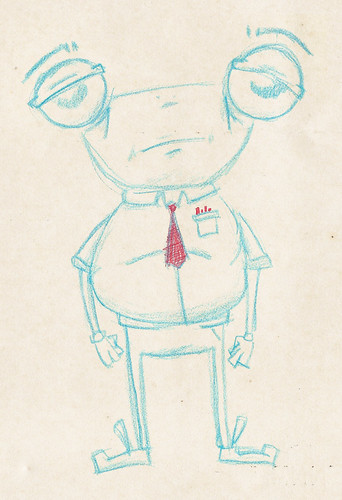
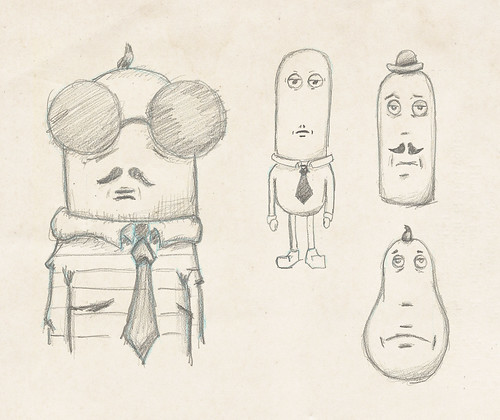
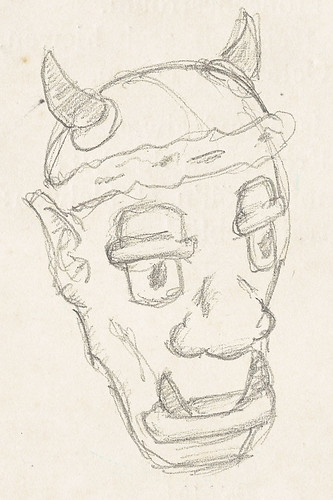
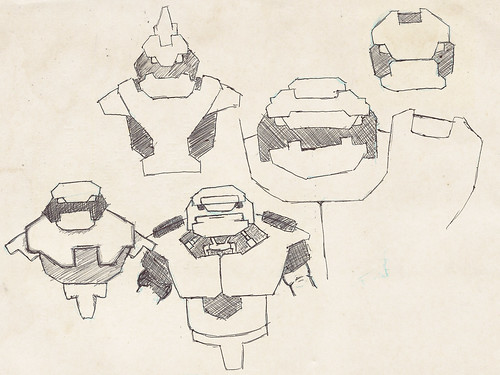
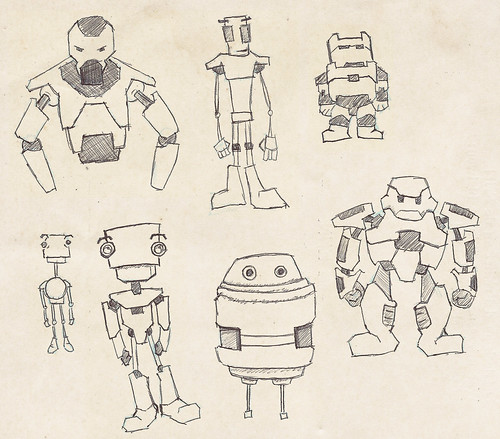
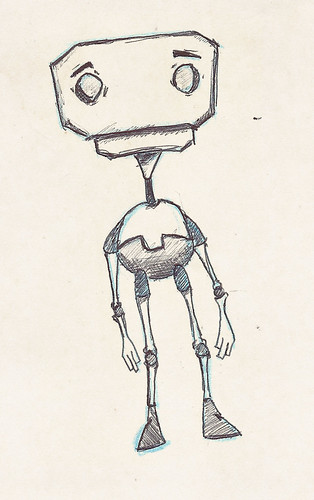
Sketches
Today I got around to uploading some sketches from my most recent sketchbook, a wide verity of characters from stylized people to some robots.
The ones I like the most I will probably end up bringing them into Illustrator to turn them into vectors & give'em some color.
The ones I like the most I will probably end up bringing them into Illustrator to turn them into vectors & give'em some color.
Tuesday, September 13, 2011
Animated Shapes With a Hit of Hanna Barbera
Throughout the last couple of weeks I've been working in bits on this little five second piece of animation. Initially I just wanted a simple piece of animation with a shape forming fluidly into other shapes with exploring some principles of animation (squash, stretch, exaggeration, secondary action, etc.) About half way through the project I thought I'd dip into some sound design since I hadn't for awhile & I had over 60gbs of sound effects at my toes. Some more info in the project on the Vimeo page.
Monday, September 12, 2011
Help Bot 2000
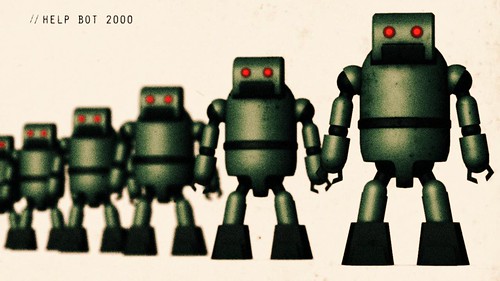
Messing around Cinema for a couple of hours & ended up making this quick robot character. Did a little in post in After Effects. Found it much more effective to use render out a depth pass & deal with it in After Effects then to have the depth of field be rendered out with the beauty pass.
I'm sure this little guy is trust worthy around your house, you know, with those red eyes.
Sunday, August 28, 2011
Retro Gaming Models
A bit ago I wanted to dive into some more modeling with Cinema 4D since I made the jump to it from Maya a couple months back. I had some fundamentals of modeling knowledge from using Maya for a couple of years & wanted to work them out with the tools that Cinema 4D had in their set. I discovered that Cinema 4D's deformers were more forgiving then Maya's, which would pretty much overall mean that I would feel more confortable with using them. Some of these models were made in couple of hours so some of the typology doesn't flow well like it should but I think it was a valid sacrifice to make in the time it took to make them.
Some more info on the Vimeo page.
Some more info on the Vimeo page.
Sunday, August 7, 2011
Circles & Shapes Placed Around My Name
For awhile I've been meaning to just sit down & design some stuff & publish the same day so I spent my Sunday evening messing around with some shapes in circles & placing them around my name in After Effects. Hopefully I'll commit to publishing some simple designs a couple times a week.
Tuesday, July 26, 2011
Spinal Tap Intro & BMX Video
In the past week I've been working on a piece for Fox Head. Fox wanted me to create an intro for their Spinal Tap video using their art work. So they sent over the photoshop file & then went straight to peeling the layers apart. I set my head on including C4D in this project to give it a little something more & this was the final product.
I definitely wanted to do more with it but as always you gotta get'er before the deadline. It was quite a fun project with the art direction.
Also I never updated when I posted the BMX edit I was working on, so here is the update finally.
I worked hard on the color correction this time around to capture the feel of the song I had picked out. I also used the warp stabilizer tool in After Effects to help out some of the footage, helped a whole lot since you know I suck at filming ;P
Sunday, June 19, 2011
Edit Coming soon & Father's Day
Been a bit since I've wrote, been kinda busy with a new job. Lots been different since I've last wrote.
Probably the best thing worth mentioning is I've been sleeping more regularly, finally fixing my biggest problem. You notice how many all your little quarks slip away when you get your 7 - 8 hrs. Definitely hard to keep up with the routine but it helps a lot.
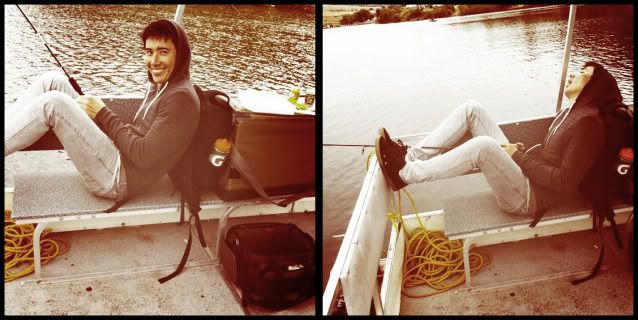
Today was Father's Day. Went to Irvine lake with my family to do some traditional fishing. Didn't catch a single thing, yet it was still a good time.
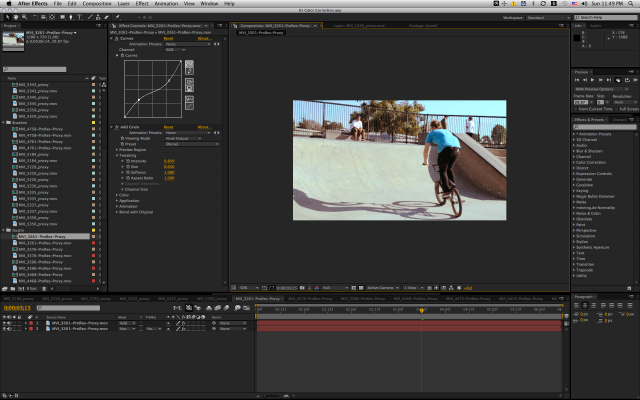
I've been working on a BMX edit for a bit, 'bout to wrap things up with it. Just have to color correct the dang thing. As always I'm going for that "film" look. Making sure I take my time with it though.
Here is a quick screen capture of my progress:
& Here is me fishing & then fishing while passed out:
Probably the best thing worth mentioning is I've been sleeping more regularly, finally fixing my biggest problem. You notice how many all your little quarks slip away when you get your 7 - 8 hrs. Definitely hard to keep up with the routine but it helps a lot.
Today was Father's Day. Went to Irvine lake with my family to do some traditional fishing. Didn't catch a single thing, yet it was still a good time.
I've been working on a BMX edit for a bit, 'bout to wrap things up with it. Just have to color correct the dang thing. As always I'm going for that "film" look. Making sure I take my time with it though.
Here is a quick screen capture of my progress:
& Here is me fishing & then fishing while passed out:
Wednesday, May 18, 2011
DMA/LA & 'The Jacket'
Tonight I was wondering about the Netflix library determined to find a movie worth watching. Almost giving up I came about a movie called "The Jacket". This is without a doubt one of best movies I've seen. I got so lost into it that I didn't want it to end. Adrien Brody's was absolutely fantastic in it. Definitely going on my shelf of favorite movies. Definitely check this movie out.

On the other hand tonight I went to DMA/LA. An owner of an animation studio called Renegade Animation came in to talk about what they do & the process of how the company came about. Ashley Postlewaite, the owner, had a lot to say about each question everyone had to ask in probably the most positive & honest way. You could definitely tell that as an owner she cared much for her employees & was just refreshing to hear what she had to say.
On the other hand tonight I went to DMA/LA. An owner of an animation studio called Renegade Animation came in to talk about what they do & the process of how the company came about. Ashley Postlewaite, the owner, had a lot to say about each question everyone had to ask in probably the most positive & honest way. You could definitely tell that as an owner she cared much for her employees & was just refreshing to hear what she had to say.
Friday, May 6, 2011
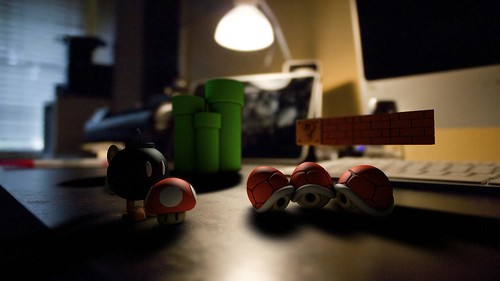
Mario Desk
It's been a bit since I've posted something. I've been working on some modeling stuff with Cinema 4D & wanted to keep up with a constant theme so I chose Super Mario objects. I learned a whole lot about the different ways you can go about modeling stuff in Cinema 4D compared to Autodesk Maya. Of course the same techniques could be translated to Maya but Cinema 4D's shortcut modeling tool set that I used to model some of the objects seemed to be a bit more stable then Maya's.
I wanted the objects to be used in a quick project so I decided to just snap a quick photo & match the perspective in Cinema 4D & quickly composite the objects in the photo.
It dragged on a little longer then I anticipated, just cause the composting was a bit of a hassle. The objects weren't too "photo realistic" but that wasn't what I was aiming for completely. Overall I was happy with the results & learned some stuff to speed up my work flow for the next time I go about modeling & composite.
Thursday, April 14, 2011
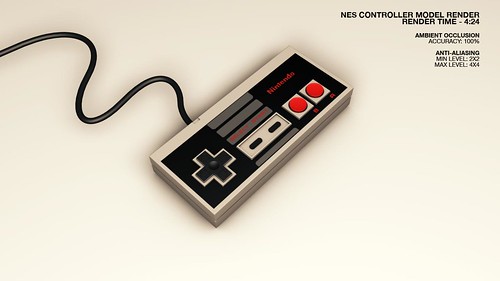
NES Controller!
Today I set out to finish up my GameCube model with adding a couple things to finish it up but then still had the urge to model some more. I already had the NES Controller in mind to model so I went straight to it. This time around though I wanted to do it cleaner & more organized. Since I didn't have the physical controller, I know such a crime to not have a NES system, I had to look up some details & get some high resolution images to paint my textures.
I started out modeling with Adobe Illustrator creating the paths then exporting it to Cinema 4D. I made sure to keep the hierarchy clean this time with naming & 'n what not.
I haven't touched the UV tools yet in Cinema 4D so I thought it to be perfect start out with this model to learn UV texturing, it was a simple model so it would be easy. I'm already really familiar with the concept of UV mapping, texturing, 'n what not with Maya, just didn't know my way around the buttons with the Cinema 4D.
The results went pretty well, just need to adjust the materials a bit to make it more of a plastic look but I wasn't too concentrated on that. Just wanted it to look presentable for the most part.
Wednesday, April 13, 2011
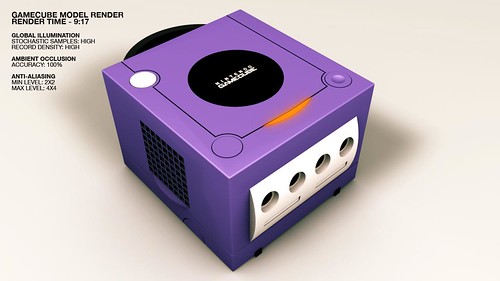
Boole, Extrude Nurbs, & Cloner
I've been getting a little into some serious modeling with Cinema 4D the past couple of days. I was toying around with the different ways to model some objects & found out how efficient it was to use the boole, extrude nurbs, & cloner tool in Cinema 4D to model. So I finally sat down today to actually try to finish a model.
I picked none other then my awesome Nintendo Gamecube! I got some exact measurements off the net & started from there. I had to break out the ruler after awhile to figure out where some exact pieces were on the game cube. I was getting pretty siked on modeling it after an hour or so. I think I spent at least 5 hrs on the model not including my distractions & the render times.
I'm pretty happy with the results, here is the work in progress.
I added in a little render info while I was tweaking the colors & adding some glow in the orange in photoshop.
Tuesday, April 5, 2011
jaypeeare.com! & new reel '11
I finally got to wrapping up my reel '11 edit & getting up my website. I gotta add more to the website but it's up & I'm just happy it's up ha ha. Definitely I hate web design the most just cause of it's constant coding & if something isn't set up correctly then it doesn't work at all, ha. Anyways, I as well have to add more things to my reel but it's pretty much up to date. Just a couple of side projects that have been lingering that I have to get on.
Check it: jaypeeare.com
& Behold my reel 2011!
Check it: jaypeeare.com
& Behold my reel 2011!
Monday, April 4, 2011
Glitch Effect
I've been working on another side project for my reel to spice it up, limiting to 5 seconds or so. The project is really intensive with the style of a corrupted video file effect. I've been using pretty much all in house after effects effects except one, which is separating the RBG channels. I could achieve the effect with out the plug-in but just makes it easier using it.
The original thing that spiced up this project was the tutorial "De-sync Expressions Tutorial by Sebastian" on greyscalegorilla.com. I was playing around with the expression the tutorial explored but instead of using arrows I used 3D rings that rotated in 3D space rather then just it's position. The look of the 3D rings looked a bit sci-fi so I started to build elements & kept going with it.
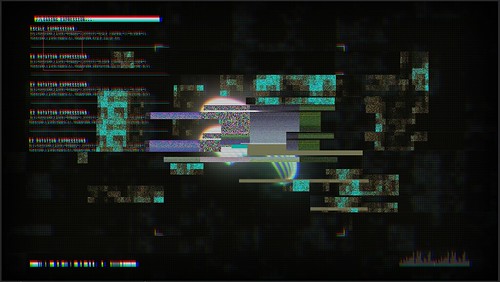
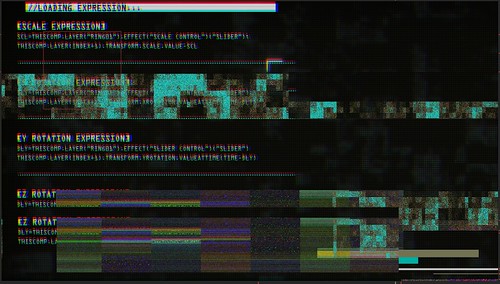
De-sync Expressions Tutorial by Sebastian
The original thing that spiced up this project was the tutorial "De-sync Expressions Tutorial by Sebastian" on greyscalegorilla.com. I was playing around with the expression the tutorial explored but instead of using arrows I used 3D rings that rotated in 3D space rather then just it's position. The look of the 3D rings looked a bit sci-fi so I started to build elements & kept going with it.
De-sync Expressions Tutorial by Sebastian
Friday, March 25, 2011
Website & Reel '11 Coming Soon...
Been working viciously on getting up some new stuff made for my portfolio, some Cinema 4D action, & a simple website, finally, to present my work. Along with some new work to put into my '11 reel I decided to create a new intro/out. I was playing around with some ideas & finally came up with a decent design kind of having to do with a computer interface but very simplified.
A couple of renders over the process of creating the intro.


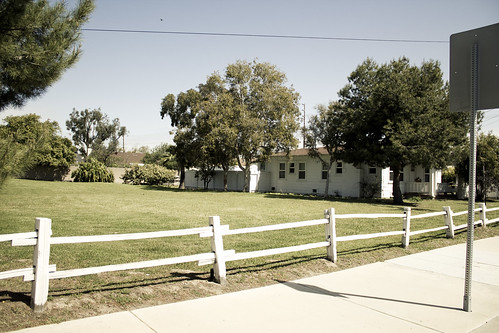
The other day I found driving about I spotted this house with an awesome grass field on the side of it. I instantly got this awesome vibe from it just looking at it, just thinking that it would be probably awesome to film something there. Pretty sure that house had been there for quite some time.
A couple of renders over the process of creating the intro.
The other day I found driving about I spotted this house with an awesome grass field on the side of it. I instantly got this awesome vibe from it just looking at it, just thinking that it would be probably awesome to film something there. Pretty sure that house had been there for quite some time.
Sunday, March 20, 2011
Global Illumination Renders.
The past couple of days I've been playing around with rendering & got to rendering with Global Illumination & Ambient Occlusion. I was pretty familiar with both rendering techniques before learning C4D with Maya but find it much easier to set up & play around with in Cinema 4D. The renders can get a bit lengthy with Global Illumination, got to around 15 minutes once I started to bring up the sampling & the diffuse depth. I kind of grabbed the concept from Nick Campbell's tutorial with GI with the Light Bars(Poles?).
I needed to bring up the sample rate so the render doesn't look as dirty but for the most part I'm getting the hang of it with the different options with the GI interface on C4D. As well as the shadows are a bit too dark so I have to figure it out.
Also a technique I've learned about was shadow casting. Basically creating a light in C4D, instead of having a object illuminate the scene, & it having casting shadows upon objects but not casting light. This technique helps because the shadows that illuminated objects cast don't have that strong of a shadow but lights in C4D do but sometimes over light the scene but make out for some good deep shadows.
Hopefully I can get some test animations done by tomorrow if I have time. If not then early next week. Need to get some C4D stuff on my reel.
Wednesday, March 16, 2011
DMA/LA & Cinema 4D Render.
Today I finally got to going to the monthly meet up at DMA/LA, this month was a bit of a change with the type of Digital Art that was discussed. They had a Luxology Modo modeler come in to show some of his workflow with modeling & textureing. The modeler himself, Jonathan Feldman, first used Autodesk Maya back in 1999, I believe he said, to do all his CIG business but then later found out about Luxology Modo in it's very first edition. He said after a week of trying out Modo he switched his whole work flow to it which surprised me a bit because I always thought Maya did a good job competing with other 3D packages with their modeling & texturing workflows. But I guess I'm not one to really have a say due to me not being a serious professional 3D modeler/texture artist.
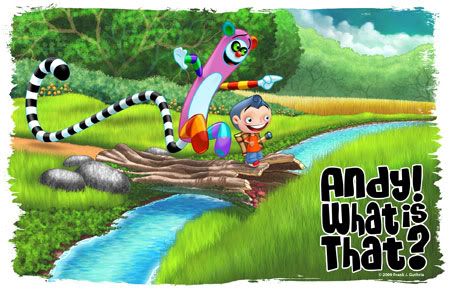
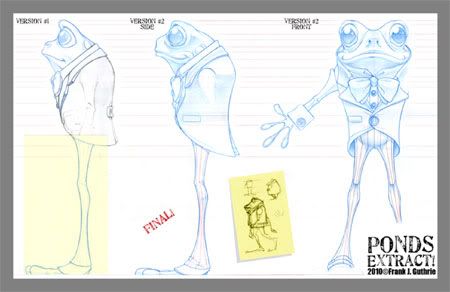
What was more of a treat was the next speaker, which was Frank Guthrie. Frank is a storyboard artist that works at Nickelodeon working on Dora the Explorer & with his prior project The Anger Beavers. His work is absolutely amazing & he is quite a funny guy cracking a lot of jokes while presenting his workflows with Adobe Photoshop. With him being in the industry for such a long time he actually got to telling us that he was the one to introduce Photoshop & Wacom tablets to Nickelodeon workflow for animated shows. He really got into the importance of knowing big time savers, for example the "Actions" panel in Photoshop, HotKeys with any programs, Wacom Tablets, & Brushes in Photoshop. We got to see quite a bit of his work & even saw him sketch while his Q & A. I looked around for his work but didn't find anything other then what was on the flier for DMA/LA.
Definitely a good time going & inspiring to see Frank's work, seeing his sketches brought me back to the very basics of why I love animation/cartoons so much.
I also learned why sticky notes are sized the way they are, for 4:3.
& now since they have HD they are now 16:9.
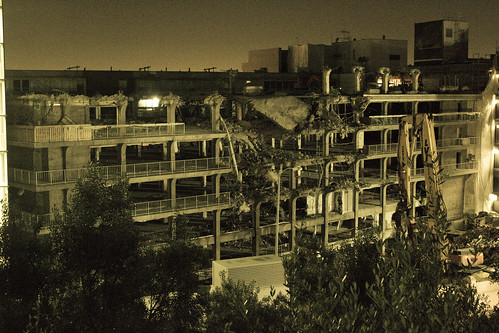
When I was leaving the place where DMA/LA is I saw this parking lot that was being torn down.
I finally got to rendering some stuff in Cinema 4D while my adventure still continues with learning the program. Having lots & lots of fun with it & my Digital Tutors account is definitely paying off now, ha. This probably looks cheesy as hell but I think I'm getting somewhere with it. When I was in the editing process in Photoshop I was playing around with the colors & decided to make a hue adjustment animation GIF.
Getting more cheesy? I think yes, ha. It's so much easier setting up rendering in Cinema 4D compared to Autodesk Maya, bleh.


What was more of a treat was the next speaker, which was Frank Guthrie. Frank is a storyboard artist that works at Nickelodeon working on Dora the Explorer & with his prior project The Anger Beavers. His work is absolutely amazing & he is quite a funny guy cracking a lot of jokes while presenting his workflows with Adobe Photoshop. With him being in the industry for such a long time he actually got to telling us that he was the one to introduce Photoshop & Wacom tablets to Nickelodeon workflow for animated shows. He really got into the importance of knowing big time savers, for example the "Actions" panel in Photoshop, HotKeys with any programs, Wacom Tablets, & Brushes in Photoshop. We got to see quite a bit of his work & even saw him sketch while his Q & A. I looked around for his work but didn't find anything other then what was on the flier for DMA/LA.
Definitely a good time going & inspiring to see Frank's work, seeing his sketches brought me back to the very basics of why I love animation/cartoons so much.
I also learned why sticky notes are sized the way they are, for 4:3.
& now since they have HD they are now 16:9.
When I was leaving the place where DMA/LA is I saw this parking lot that was being torn down.
I finally got to rendering some stuff in Cinema 4D while my adventure still continues with learning the program. Having lots & lots of fun with it & my Digital Tutors account is definitely paying off now, ha. This probably looks cheesy as hell but I think I'm getting somewhere with it. When I was in the editing process in Photoshop I was playing around with the colors & decided to make a hue adjustment animation GIF.
Getting more cheesy? I think yes, ha. It's so much easier setting up rendering in Cinema 4D compared to Autodesk Maya, bleh.

Saturday, March 12, 2011
More Cinema 4d!
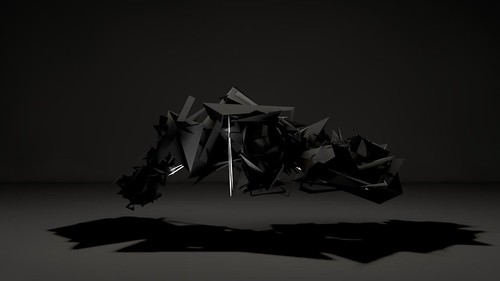
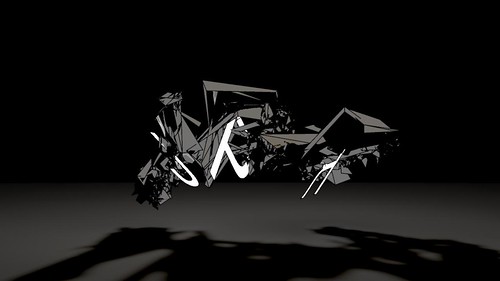
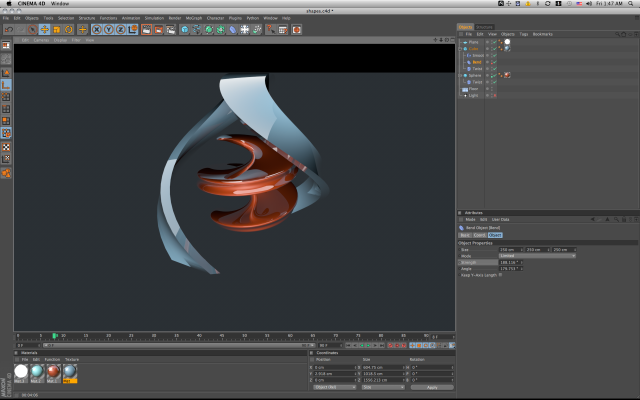
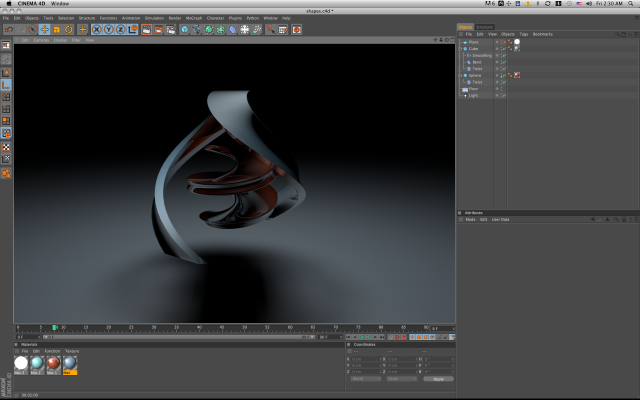
So I finally got to rendering with Cinema 4d. One thing forsure is that it was way easier setting up the scene to render then Autodesk Maya. For a very long time, and even still, I have trouble rending stuff with Maya. I guess watching Greyscale Gorilla's tutorials in the past help a lot to getting around how the texturing objects. I played with a couple of effects as well with bending shapes.
I also got a little into thinking particles with reading some in-dept tutorials. It seems like Xpresso is the substitute for scripting for Cinema 4d. That make me feel better due to the fact that I don't know any about scripting, well next to nothing, ha.
Maya is heavily based on scripting to get some jobs done, so making this transition to another 3D application seems to be getting better.
Here are a couple of screen captures.
Monday, March 7, 2011
Cinema 4d!
For awhile now I've been really meaning to get to digging into Cinema 4D & really learning it. I'm pretty familiar with the fundamentals of 3D applications from my experience in Autodesk Maya. The button layout is the main thing that is bugging me so I spent some time fixing up the controls to be similar to Maya, worked out pretty well.
I really like playing with the dynamics system in Maya & the Cinema 4D dynamics setup was pretty easy to get into since it uses the same terminology. Played around till I got to rendering, it seemed to be off & not responding to what I was setting up the material to render as. Called it a day with learning what I could. Hopefully I could figure it out soon.
I made it out during the weekend to shoot some photos of my friend Rachel, attempted to do some head shots but found out quickly it is much harder, ha. The sun seemed to get tucked underneath(or ontop?). Had to work with what I had...
My friend Laura came too, she helped with fixing Rachel's hair. We had some fun after taking the headshots. Hopefully editing the photos will go smoothly since it a bit more serious this time rather then some fun color correcting.
Friday, March 4, 2011
Solution for Automated Tasks.
Automator & Compressor have been two programs on the Mac I've been wondering about for a good while now on to use them properly. Well Automator I did really have clue what it did, Compressor I knew exactly what it did but was just familiar to the interface.
I took the time to figure out what Automator did exactly & it's something that I've probably needed for a good while. Basically a script builder that is made for people that don't know how to write scripts for computers. I've always always been interested in learning scripting for computers but was just overwhelmed by all the confusing characters 'n what not. This program is perfect for me.
I highly suggest people that spend a lot of time filing & organizing there computer to learn this simple program. Take some time to look on YouTube to figure out the basics & in about twenty minutes you'll be making formulating scripts that are fairly simple but very help for with sure automated tasks.
Anybody that is familiar with Final Cut Pro is sure to heard of Compressor, over all a batch exporter for codec for videos. This program is useful when you just had captured a batch of clips & wanted to export the codec to say Apple Prores, H.264, & so on...
Finally got to learning the interface & using it properly. Its definitely a big help in exporting videos. I use to do all exporting work just with Quicktime Pro, it helped with learning the rounds about compressing video with changing the settings manually but not Compressor is a bigger help.
Thursday, March 3, 2011
Another Daily Challenge Ahead! & Sunshine Cleaning
Since I've been done with the "A Photo a Day for 50 days Challenge" I decided to do another challenge that is similar. The challenge is for 15 day (possibly 30) & consist of me designing something & animating it for 1 second. I was planning to do this for a while ever since I was inspired by Steffen K's "30 Motion Tests in 30 Seconds". It's a good time to do it for myself since I've been trying to work on portfolio. I'm not sure if I could take the challenge on during weekends but I will see hot it goes the first couple of days. I'm first taking the time to get some inspiration for it following a strict design style so it all weaves in nicely when I'm finished & ready to edit it all together. I plan to use mostly After Effects & Maya all of it. With Maya I'm sure I'll be creating a lot of Dynamic Simulations.
Hopefully I can start in the next couple of days. I'll deff have to concentrate on this one more since it's a lot more time consuming.
You can Peep Steffen K's work:
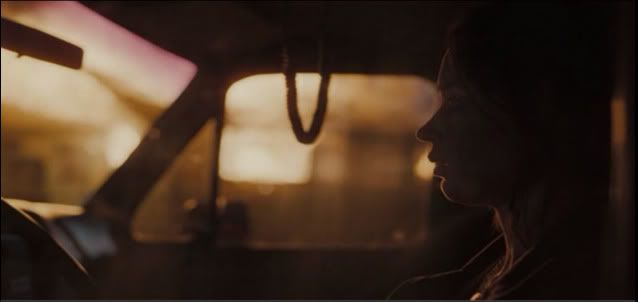
On another note I got caught up with watching 'Sunshine Cleaning' on Netflix tonight. I've been meaning to watch this movie for sometime & couldn't settle for just watching half of it, so I had to finish it even though I had planned to work on some stuff.
The movie was pretty good. I may want to buy the DVD depending on if it has commentary.
This was my most favorite frame of the movie, wish I had it higher resolution. Maybe I should post a single frame of a movie that I like every time I finish one. Sounds like a good idea?
Hopefully I can start in the next couple of days. I'll deff have to concentrate on this one more since it's a lot more time consuming.
You can Peep Steffen K's work:
On another note I got caught up with watching 'Sunshine Cleaning' on Netflix tonight. I've been meaning to watch this movie for sometime & couldn't settle for just watching half of it, so I had to finish it even though I had planned to work on some stuff.
The movie was pretty good. I may want to buy the DVD depending on if it has commentary.
This was my most favorite frame of the movie, wish I had it higher resolution. Maybe I should post a single frame of a movie that I like every time I finish one. Sounds like a good idea?
Tuesday, March 1, 2011
Birthday boy, Half Life 2 Series Complete, & Last Photo!
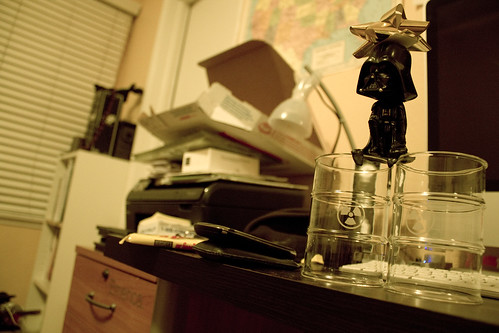
So for the last time, for my "Take a Photo a Day for Fifty Days Challenge" I didn't really put a lot of energy into my last photo for this project since it was a lazy day as it was. My friend Laura came over till the strike of midnight to my birthday & she had given me these gift. My computer has a Darth Vader to chill with now & now I can sip some toxic liquids while I work hard on my computer, THANKS LAURA!
I learned a whole lot in this project from the basic use of the camera to set the correct exposer to editing photos in post with the CR2 settings to just plain old photoshop fixes. Definitely will be doing another photo project like this again but probably with an edge to it.
Expect a more intensive daily project to come about that doesn't deal with cameras, well kind of!
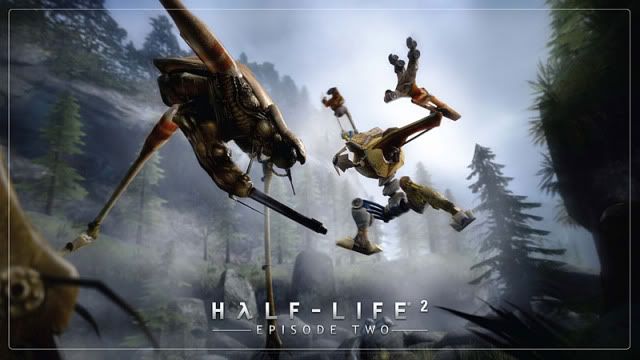
Well on another note I finished the series Half Life 2, which includes Episode 1 & 2. If I were to call myself an actual gamer at all this game would definitely be on the check list a long side many great games. So even though it was a small vacation from hacking away on my computer After Effects, Final Cut Pro, Photoshop, Maya, etc. I think of it as a education vacation learning what makes a great game with a real good storyline, which Half-Life 2 definitely has. G-Man is probably the biggest twist of all in this storyline by far. I gotta thank my friend David that I met at Santa Monica College for getting me into Valve's awesomely awesome games. I guess my next little vacation that I will let happen will be for Portal 2. Dog was by far the best character in the game by the way, even though he didn't say a single word. That I think is the key, "Silence is Golden". I dunno if that even made sense, anyways.
As well my birthday just ended a couple of hours ago, I'm now officially 21...
There's not much to say about being 21 & not being a big drinker. I guess I could gamble now? Haha, I'm sure I won't be doing much of that at all too.
I learned a whole lot in this project from the basic use of the camera to set the correct exposer to editing photos in post with the CR2 settings to just plain old photoshop fixes. Definitely will be doing another photo project like this again but probably with an edge to it.
Expect a more intensive daily project to come about that doesn't deal with cameras, well kind of!
Well on another note I finished the series Half Life 2, which includes Episode 1 & 2. If I were to call myself an actual gamer at all this game would definitely be on the check list a long side many great games. So even though it was a small vacation from hacking away on my computer After Effects, Final Cut Pro, Photoshop, Maya, etc. I think of it as a education vacation learning what makes a great game with a real good storyline, which Half-Life 2 definitely has. G-Man is probably the biggest twist of all in this storyline by far. I gotta thank my friend David that I met at Santa Monica College for getting me into Valve's awesomely awesome games. I guess my next little vacation that I will let happen will be for Portal 2. Dog was by far the best character in the game by the way, even though he didn't say a single word. That I think is the key, "Silence is Golden". I dunno if that even made sense, anyways.
As well my birthday just ended a couple of hours ago, I'm now officially 21...
There's not much to say about being 21 & not being a big drinker. I guess I could gamble now? Haha, I'm sure I won't be doing much of that at all too.
Sunday, February 27, 2011
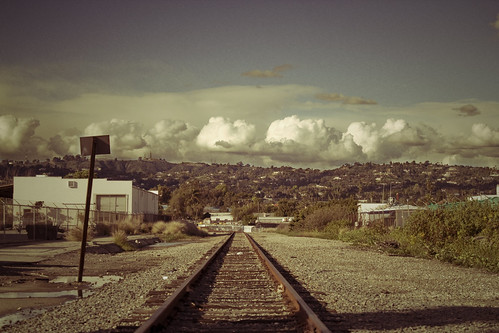
Wasn't it Suppose to Rain Today?
For my "Take a Photo a Day for Fifty Days Challenge" I attend the 'Sausage Fest' at the Vault Skatepark. It was quite a fun day, lots a good friends coming together to ride some bikes & watch people ride. It was suppose to rain this day but which ended in the very opposite weather, a blue sunny sky... On the way to my car I noticed the clouds coming over the hills & I was standing on some rail road tracks & thought of it to be a good shot. In the post I did a bit of tweeking in the CR2 settings in photoshop to make the colors saturated & leveled between every section of the photo, since some of it was exposed more then other parts. I had to go beyond the CR2 settings to achieve the look I was trying to get so I went into photoshop & did a bit of masking & adding contrast in the clouds. Changed the colors a bit too with the overall look of the picture to make it more of an aged photo (I guess?).
Saturday, February 26, 2011
Close to the end & Failed Plan.
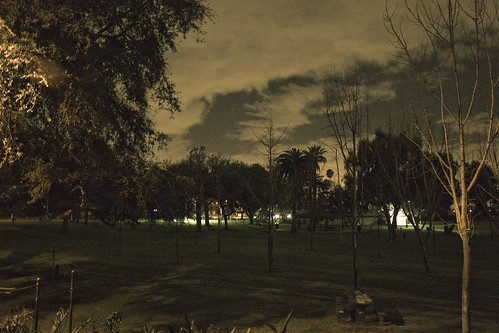
For my "Take a Photo a Day for Fifty Days Challenge" for day 47 I took a photo of what my back yard ends up to be when you go threw the gate. When I moved here about a half year ago I was pretty siked on having a gate to a park & would think I would spend a lot of time there but I never do, ha. Well I've been there a few times, but definitely not enough.
For day 48 I had quite a mission planned out after I got out of work late on Friday to go to a building under construction. The building is still in it's base structure form right not & that was exactly what I wanted. What made it better was there was a parking structure right next to it, which would made it easy to snap a high photo of the under construction building. So I headed there after work & came to find out there was no way into the parking structure since it was being used by the construction workers unless if I jumped some pretty high fences but would probably end up with security catching me. I'll probably make another attempt at snapping a photo there, maybe for the last day for this project. So I ended up taking a photo on the way home that I've always had in mind to take a photo of but wanted to take it while it was raining, which it was :D

For day 48 I had quite a mission planned out after I got out of work late on Friday to go to a building under construction. The building is still in it's base structure form right not & that was exactly what I wanted. What made it better was there was a parking structure right next to it, which would made it easy to snap a high photo of the under construction building. So I headed there after work & came to find out there was no way into the parking structure since it was being used by the construction workers unless if I jumped some pretty high fences but would probably end up with security catching me. I'll probably make another attempt at snapping a photo there, maybe for the last day for this project. So I ended up taking a photo on the way home that I've always had in mind to take a photo of but wanted to take it while it was raining, which it was :D
Subscribe to:
Posts (Atom)